

Method 1 – Pointing Domain to VPS via A record
The following strategy is quite a simple one. The current A record should be updated in the DNS zone. This means that the DNS region where your name servers currently point is required to perform the A record switch.
If this option is chosen, the DNS zone file will stay with the current provider and contains all existing entries (CNAME, MX, NS and other records). For beginners or people who do not want to adjust the DNS region, the solution can be simpler.
You can use DNS lookup software or use the dig command to find NS records if you’re not sure where your domain name is heading at the moment. Executing the following command via terminal will do the trick:
Now that you know where your domain is pointed, navigate to the provider and open up your domain’s DNS zone.
Adding DNS entries
There are two approaches to choose from at this point:
- Using two a records – one for the www subdomain and another for the domain itself.
- Using A record for the domain and CNAME for the www subdomain.
The same result will be achieved for both of these options. Start by finding the current Record value and substitute for it with the previously defined IP address. Below is an example of how your entries in your DNS zone will look like.
Performing DNS Lookup
It is time to check if the records were updated following the pointing of your domain to your VPS. Note that DNS propagation will take until 24 hours, so you might need to wait for everything to start to run for at least a couple of hours. Most DNS monitoring tools, however, offer instant results. This can also be done via terminal via the dig command:
If your VPS IP address is shown as a record in the production, everything has gotten right! The rest is waiting for the DNS to spread worldwide. You can flush DNS and clear browser cache to speed up the process. After the DNS is fully active, when you browser to your domain, you will see a default loading page.
Method 2 – Pointing Domain to VPS via Custom Name servers
It’s a little trickier to point a domain to VPS using a custom name server, as a new DNS zone on the virtual server is required. The DNS zone will be transferred to VPS, so all future changes to the DNS region must be made through the newly created area.
Creating Custom Name servers
Start by building your domain’s new child name servers. The VPS dedicated IP address is required for each entry. You can use the domain control panel on Casbay.
Setting Up a DNS Zone on VPS
The next step is setting up a DNS zone for your domain on the virtual server. Connect to your VPS via SSH and go to:
Using the nano command, create a new zone file for your domain:
Use the following example and replace all IP address and domain instances with your actual domain name and the dedicated IP of your VPS:
Save the file by pressing CTRL+X and confirm the changes. The next task is inserting it in the default bind configuration:
Add the following lines in the bottom and make sure to edit the file name with the real values:
If the task was done correctly, the output should be similar to:
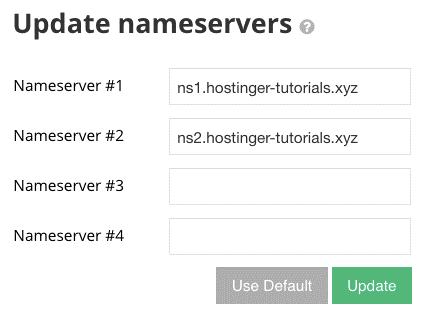
Changing Name servers
The last move is to shift the name server of your domain to the new one because all pieces in the puzzle have been collected. You can use the Domain Management Panel on Casbay.
Be mindful that it can take up to 24 hours for DNS to be distributed, so you have to plan to do everything for at least an hour or two. You can flush DNS and clear window cache to accelerate stuff. The accessibility of your new area can also be checked by using on-line DNS inspection tools. When your DNS is done, when your domaine is accessed via the browser, you will see a default loading tab.


